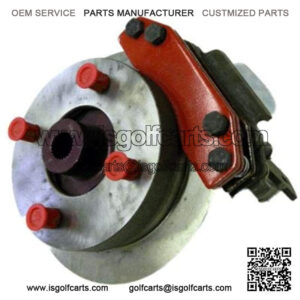
- Elevate the Golf Cart:
- Lift the rear of the golf cart off the ground using a suitable jack and secure it with jack stands. Ensure it is stable before proceeding.
- Locate the Brake Caliper:
- Identify the brake caliper that needs replacement. It’s usually mounted near the brake rotor.
- Remove the Wheel:
- Depending on the design of your golf cart, you might need to remove the wheel to access the brake caliper.
- Remove the Brake Line:
- Use a wrench to disconnect the brake line from the caliper. Be prepared for some brake fluid to leak out. Catch it in a container.
- Remove the Caliper Mounting Bolts:
- Use the appropriate wrench or socket to remove the mounting bolts that secure the caliper to the brake caliper bracket.
- Remove the Caliper:
- Gently slide the caliper off the rotor. Be cautious not to damage the brake line during this process.
- Install the New Caliper:
- Slide the new caliper onto the rotor and align it with the mounting holes.
- Attach the Caliper Mounting Bolts:
- Secure the caliper in place by tightening the mounting bolts to the manufacturer’s recommended torque specifications.
- Connect the Brake Line:
- Attach the brake line to the new caliper and use a wrench to tighten the connection.
- Bleed the Brake System:
- Bleed the brake system to remove air from the brake lines. This is essential for proper brake performance. Refer to your golf cart’s manual for the specific bleeding procedure.
- Refill Brake Fluid:
- Check and refill the brake fluid reservoir with the recommended brake fluid type.
- Test the Brakes:
- Carefully lower the golf cart off the jack stands.
- Start the golf cart and gently test the brakes in a safe area to ensure they are functioning properly.
what happens when a brake caliper goes bad
g8 gt brake calipers

