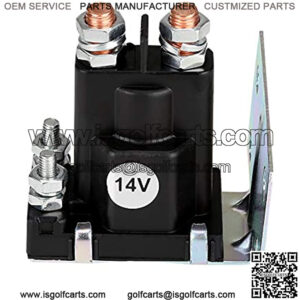
- Disconnect the battery: Before starting any electrical work, disconnect the golf cart’s battery to prevent any accidental short circuits or shocks.
- Remove the old solenoid: Use a socket or wrench to loosen and remove the bolts or nuts that secure the solenoid to the golf cart. Take note of the wiring connections attached to the solenoid.
- Disconnect the wiring connections: Carefully disconnect the wires connected to the solenoid. Depending on your golf cart’s wiring system, there may be two or more wires attached to the solenoid terminals. Take a photo or make a diagram of the wiring connections for future reference.
- Install the new solenoid: Position the new solenoid in the same location where the old one was removed. Attach the mounting bolts or nuts to secure it in place. Ensure the solenoid is aligned correctly.
- Connect the wiring: Reconnect the wires to the appropriate terminals on the new solenoid. Follow the diagram or photo you made in the previous step to ensure the proper connections. Use wire connectors to join the wires securely. Tug gently on the wires to make sure they are properly seated.
- Inspect the connections: Double-check all the wiring connections, ensuring they are tight and secure. Inspect for any loose or exposed wires and use electrical tape to cover and protect them. Ensure that the connections are properly insulated to prevent electrical shorts.
- Reconnect the battery: Once all the connections are made and inspected, reconnect the golf cart’s battery. Ensure the battery terminals are clean and tight.
how to test golf cart solenoid with multimeter
golf cart solenoid replacement
yamaha golf cart solenoid
golf cart solenoid not clicking
yamaha golf cart solenoid test

