STEP#1: IDENTIFY THE RIGHT CLUTCH PULLER
To get started, find out the serial or VN number of your golf cart and send it to a local dealer. They will look up the model of your golf cart and tell you the right clutch puller which is required for the particular model.
STEP#2: REMOVE THE BELT
The driven is mounted on the crankshaft. It sticks out of the engine. Before proceeding to remove either the driven or drive, unhook the belt. When the cart is static, the belt is loose enough to be worked upon.
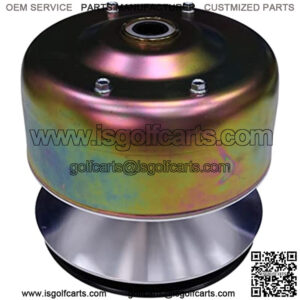
STEP#3: REMOVE THE DRIVE (SECONDARY CLUTCH)
After the belt is loose, remove the drive clutch. Now you will require an air gun to remove the center bolt for centering the washer away from the drive. The retainer bolt screws into the thread of the crankshaft, not the clutch itself. Hence, the bolt is much smaller from than the hole from which it comes out.
There are also noticeable unused threads inside the clutch. Now insert the clutch puller into the clutch hole and slightly thread it in. Using the air gun, turn the puller inward at a high speed.
The pressure created pops up the tapered fit. This will happen as soon as your clutch puller comes in contact with the crankshaft. Here, we would like to reiterate, the clutch puller is an essential tool required for this process.
POINT TO NOTE:
Modern golf carts have a tapered fit at the end of the crankshaft which causes a very tight fit to the shaft. Thereby, it does not easily come off. That is the reason the right clutch puller is necessary.
STEP#4 REMOVE THE DRIVEN (PRIMARY CLUTCH)
The driven clutch removal can be a tricky thing to pull off. The tightness and pressure of the crankshaft makes it hard to deal with. Although the driven does not have a tapered fit like the drive, and is just attached with a key or splined into the shaft, but it can still be difficult to remove. The reason is that driven is probably never been removed before and has gone rusty.
So it is recommended to put in some machine oil to help it break free easily at the time of removal. Let the oil sit in there for at least an hour and then use a little hammer to tap it. Be very gentle with the taps because vigorous tapping can cause dents in the clutch if it is made from cast aluminum.
By following this easy breakdown of the golf cart clutch removal procedure, you can easily remove the different components of the clutch and have the parts separated in no time.
“Keyword”
“how does a golf cart clutch work”
“how does a gas golf cart clutch work”
“how to remove golf cart clutch”
“how a golf cart clutch works”